d. Create the Cluster Config
Now that you installed AWS ParallelCluster and set up the foundation, you can create a configuration file to build a simple HPC Cluster. This file is generated in your home directory.
Overview of some of the ParallelCluster parameters
Below are some explanations of the cluster configuration parameters/settings, and what will be used in this workshop:
- The Region is the geographical location of the HPC to be created, using the AWS nomenclature. As with the Cloud9 instance, this cluster will be built in the Ireland region (
eu-west-1). - Each instance on the cluster will use the Amazon Linux 2 OS.
- A GP2 Amazon EBS volume will be attached to the head-node then shared through NFS to be mounted by the compute nodes on /shared. It is generally a good location to store applications or scripts. Keep in mind that the /home directory is shared on NFS as well.
- SLURM will be used as a job scheduler
- The Head-node will use the c5.xlarge instance type, with compute nodes using c5n.18xlarge instances.
- The cluster has 0 compute nodes when starting and maximum size set to 2 instances. AWS ParallelCluster will grow and shrink between the min and max limits based on the cluster utilization and job queue backlog.
- Intel Hyper-threading is disabled by setting
DisableSimultaneousMultithreading: truein the configuration file. - In this lab we will only use one queue, with one instance type for the compute nodes.
- We use a placement group in this lab. A placement group will launch instances close together inside one physical data center in a single Availability Zone to maximize the bandwidth and reduce the latency between instances.
- We are launching a NICE DCV server on the head node to enable a graphical user interface to connect to.
For more details about the AWS ParallelCluster configuration options, see the AWS ParallelCluster User Guide.
If running this outside the workshop event, you can change the instance type if you like but you may run into EC2 limits that may prevent you from creating instances or from creating too many instances. You should also be mindful of the cost of running any instances.
Source the env_vars file.
This makes sure all the required environment variables from the previous section are set.
source env_vars
2. You can have a look at them by running:
You can see what values have been set for the ParallelCluster configuration file variables by executing the following commands:
echo "Region: ${AWS_REGION}"
echo "SSH key name: ${SSH_KEY_NAME}"
echo "VPC ID: ${VPC_ID}"
echo "Subnet ID: ${SUBNET_ID}"
echo "Head node instance type: ${HEAD_NODE_INSTANCE}"
echo "Compute Instance Types: ${COMPUTE_INSTANCES}"
Check the variables listed for Region and instance types match what you’re expecting (described above). For example, the region to be used for the ISC workshop is Ireland, eu-west-1.
Using a custom Machine Image
A cluster could be set up with the base Amazon Linux 2 image, but in order to speed up the set up process in later sections of this workshop a pre-built custom image with a compiled version of WRF v4 will be used instead. This Amazon Machine Image (AMI) has been prepared with the Weather Research and Forecasting (WRF) software installed into an otherwise clean Amazon Linux 2 image.
If you run the command:
echo "Custom Machine Image: ${CUSTOM_AMI}"
This should show the prepared AMI ID: ami-0f077c9ce43173631.
This was set up with the env_vars file used in the previous section, which already contained the line to get the AMI ID you need. You can see below - just for your convenience - the line used to retrieve this AMI ID.
export CUSTOM_AMI=`aws ec2 describe-images --owners 280472923663 \
    --query 'Images[*].{ImageId:ImageId,CreationDate:CreationDate}' \
    --filters "Name=name,Values=*-amzn2-parallelcluster-3.5.1-wrf-4.2.2-*" \
    --region ${AWS_REGION} \
    | jq -r 'sort_by(.CreationDate)[-1] | .ImageId'`
Writing the cluster configuration file
A cluster configuration file named my-cluster-config.yaml will now be written which will be used to launch the cluster. Navigate back to the user home directory if not already there:
cd
The cluster configuration file can be created anywhere; it’s being created in the home directory here to make it easier to find.
Create the configuration file in the current working directory by executing the following command:
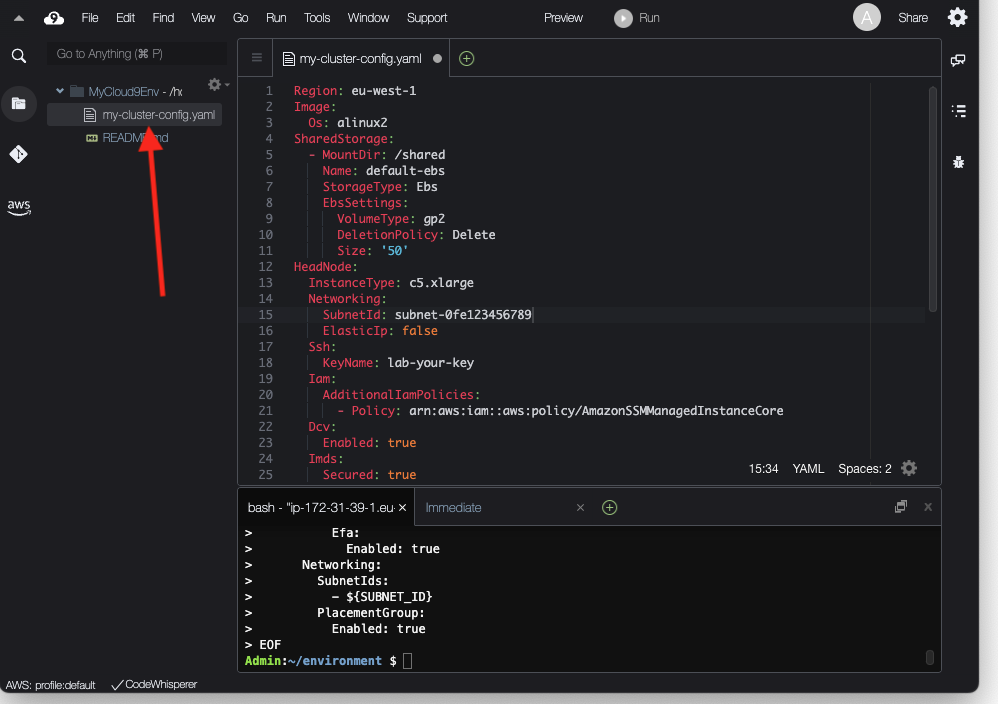
cat > my-cluster-config.yaml << EOF
Region: ${AWS_REGION}
Image:
  Os: alinux2
  CustomAmi: ${CUSTOM_AMI}
SharedStorage:
  - MountDir: /shared
    Name: default-ebs
    StorageType: Ebs
    EbsSettings:
      VolumeType: gp2
      DeletionPolicy: Delete
      Size: '50'
HeadNode:
  InstanceType: ${HEAD_NODE_INSTANCE}
  Networking:
    SubnetId: ${SUBNET_ID}
    ElasticIp: false
  Ssh:
    KeyName: ${SSH_KEY_NAME}
  Iam:
    AdditionalIamPolicies:
      - Policy: arn:aws:iam::aws:policy/AmazonSSMManagedInstanceCore
  Dcv:
    Enabled: true
  Imds:
    Secured: true
Scheduling:
  Scheduler: slurm
  SlurmQueues:
    - Name: compute
      CapacityType: ONDEMAND
      ComputeResources:
        - Name: compute
          InstanceType: ${COMPUTE_INSTANCES}
          MinCount: 0
          MaxCount: 2
          DisableSimultaneousMultithreading: true
          Efa:
            Enabled: true
      Networking:
        SubnetIds:
          - ${SUBNET_ID}
        PlacementGroup:
          Enabled: true
EOF
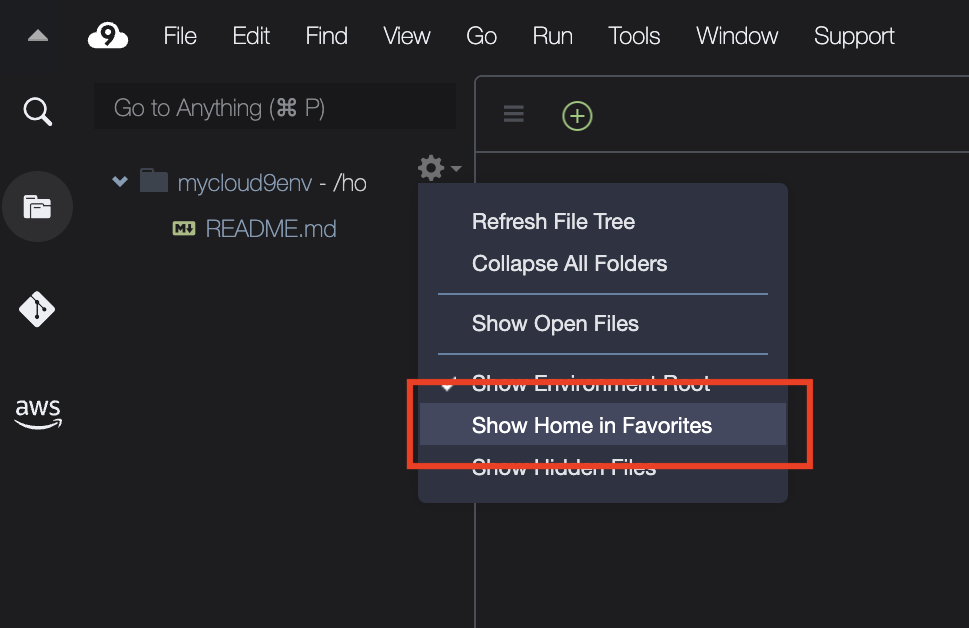
In the Cloud9 IDE, the home directory can by shown (click on the cog in the left panel). This allows you to see the .yaml configuration file just created in /home/ec2-user.
The file can be loaded by double-clicking in the IDE:
Check that the values that were previously set as environment variables are correctly filled in. If so, you are now ready to launch a cluster! Proceed to the next section.