File Cache
In the next few steps we will use the FileCache service to exchange data between the two clusters. We will create the cache connected to the Cloud Cluster and cache the data from the Onprem cluster. Before we proceed we need to know which Subnet the Cloud Cluster is setup in.
Log out of the cluster and return to the Cloud9 instance.
Before we create the File Cache we need to know which Subnet the Cloud cluster is installed in.
We will do this in two steps, first lets retrieve the Instance Id of the Cloud headnode
export CLOUD_INST_ID=`pcluster describe-cluster -n cloud -r eu-west-1 | jq '.headNode.instanceId' | sed s/\"//g`
echo $CLOUD_INST_ID
i-0e4413d8ebbd16080
Then lets see which subnet the Instance is using.
echo Subnet = `aws ec2 describe-instances --filter "Name=instance-id,Values=${CLOUD_INST_ID}" | jq '.Reservations[0].Instances[0].SubnetId' | sed s/\"//g`
Subnet = subnet-12345678
Note down this Subnet Id as you will need it in the next step.
We will also need the details of the Onprem cluster headnode. We can get that with…
export ONPREM_INST_ID=`pcluster describe-cluster -n onprem -r eu-west-1 | jq '.headNode.instanceId' | sed s/\"//g`

echo Data Repository Path = nfs://`aws ec2 describe-instances --filter Name=instance-id,Values=${ONPREM_INST_ID} | jq '.Reservations[0].Instances[0].PrivateDnsName' | sed s/\"//g`/
Data Repository Path = nfs://ip-172-31-34-123.eu-west-1.compute.internal/
Please note down this name, it will be needed later. The last piece of information we need is the DNS server. This we can obtain with the following command.
echo DNS Server Address = `pcluster ssh -n onprem -i ~/.ssh/ssh-key.pem -r ${AWS_REGION} nslookup www.amazon.com | grep Server:  | awk '{print $2}'`
DNS Server Address = 172.31.0.2
As before please note these, these values will be needed later, use examples from your own cluster, not those shown above.
We recommend keeping the Cloud9 instance open in your browser so you can refer to these values in the next section.
Please open a new tab in your browser and open the FSX Page.
https://eu-west-1.console.aws.amazon.com/fsx/home
On the left, select the “Caches” option
Then Press Create Cache
Enter the size as 1.2

Then in the network section.
Leave the VPC setting as default.
In the security groups section, add the security groups corresponding to the 2 clusters from the list. There should be five in total, the default group which was already selected. Please select the groups, one for each headnode and one for each set of compute nodes. Search for the words “cloud” and “onprem” and refer to the picture below.
Finally in the subnet section, pick the subnet id associated with the onprem cluster you discovered a few moments ago. The subnet isn’t critical, but it is best practice to configure the storage in the same AZ as the compute nodes. Picking the same subnet forces this to happen.
Once everything is entered, press Next to continue to the next page.
In this step we associate the /data nfs share on the Onprem cluster with the new File Cache.
Enter the data repository path you found previously For Subdirectories enter data For the DNS server IP addresses enter the value you found in the previous step. Finally for Cache path enter /cache
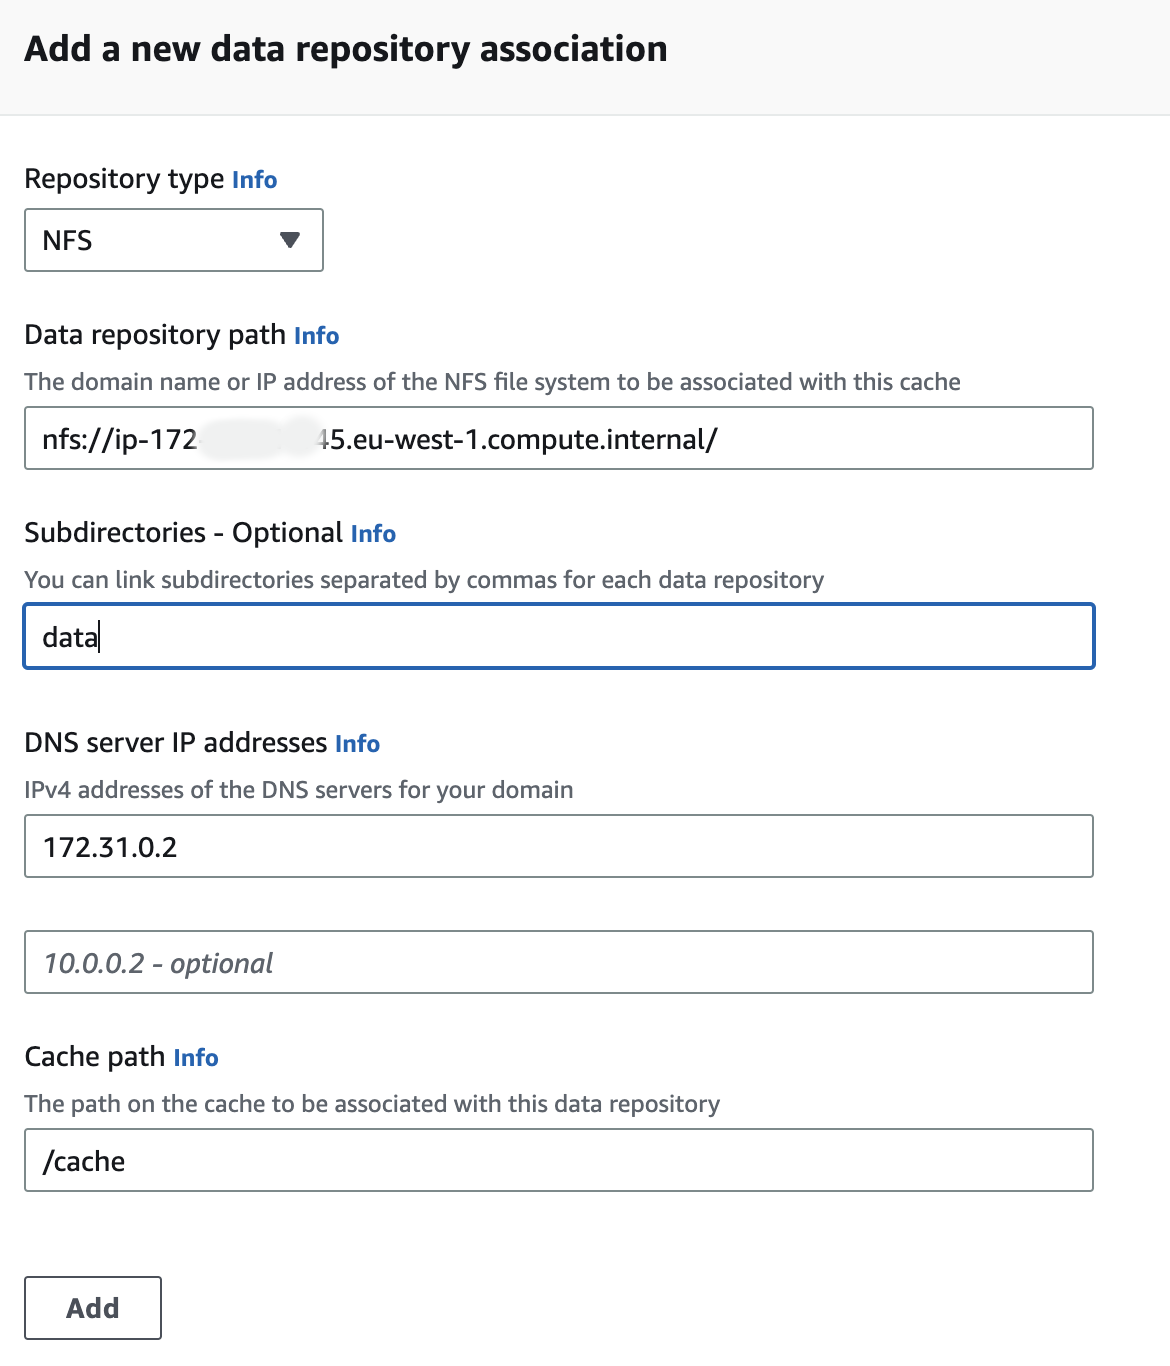
Once everything is entered, press the Add button. The repository information then gets entered into the top section of the screen.
Press next to move to the final screen.
Please check all the values are correct then press the Create Cache button.
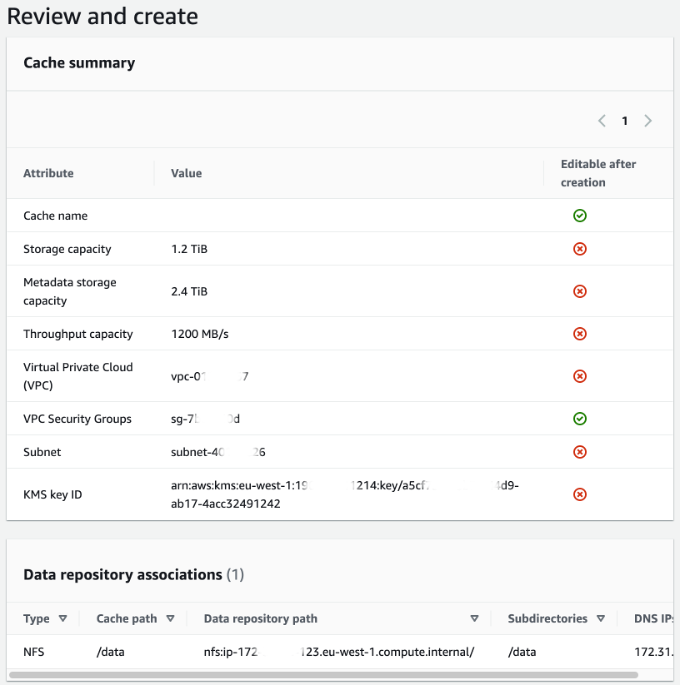
The cache will take around 10 minutes to create. The data repository association a few minutes more.
This page will show the status of the File Cache.
https://eu-west-1.console.aws.amazon.com/fsx/home?region=eu-west-1#fc/file-caches
Click on the File Cache id, then select the Data Repositories tab.
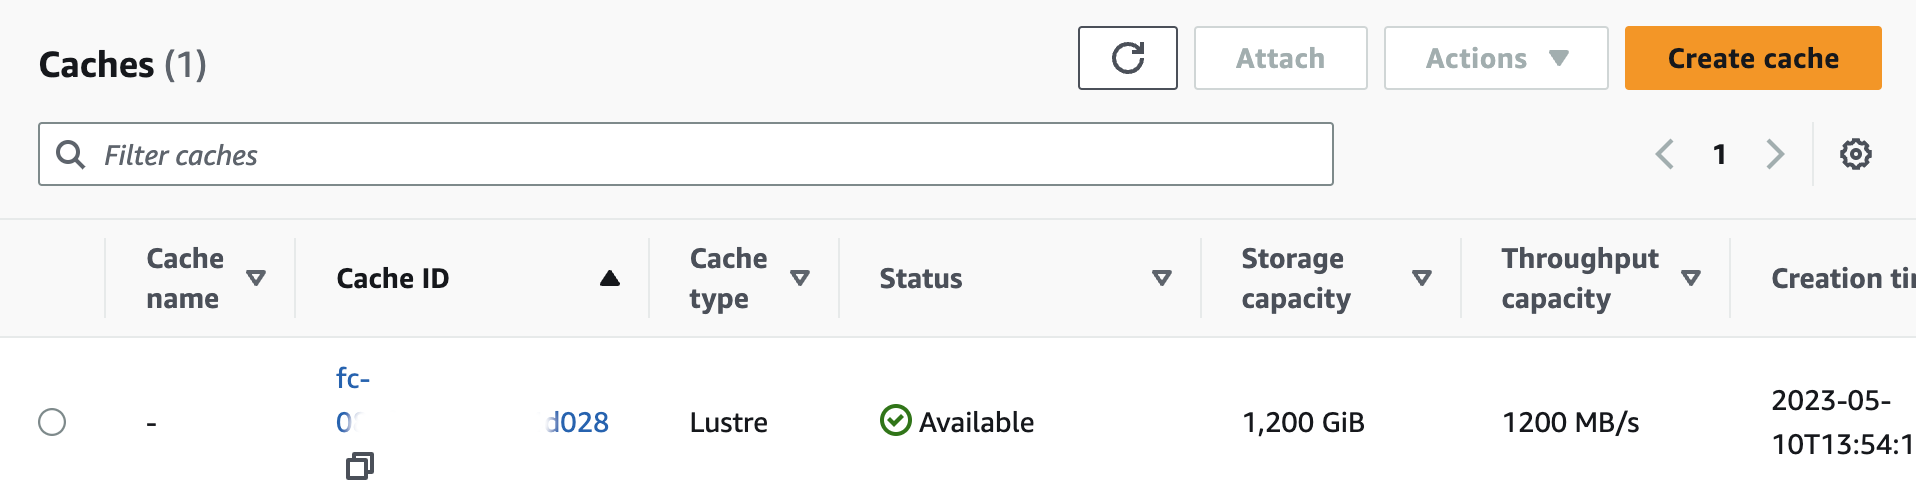
Once the data repository status is “Available” it is ok to proceed.
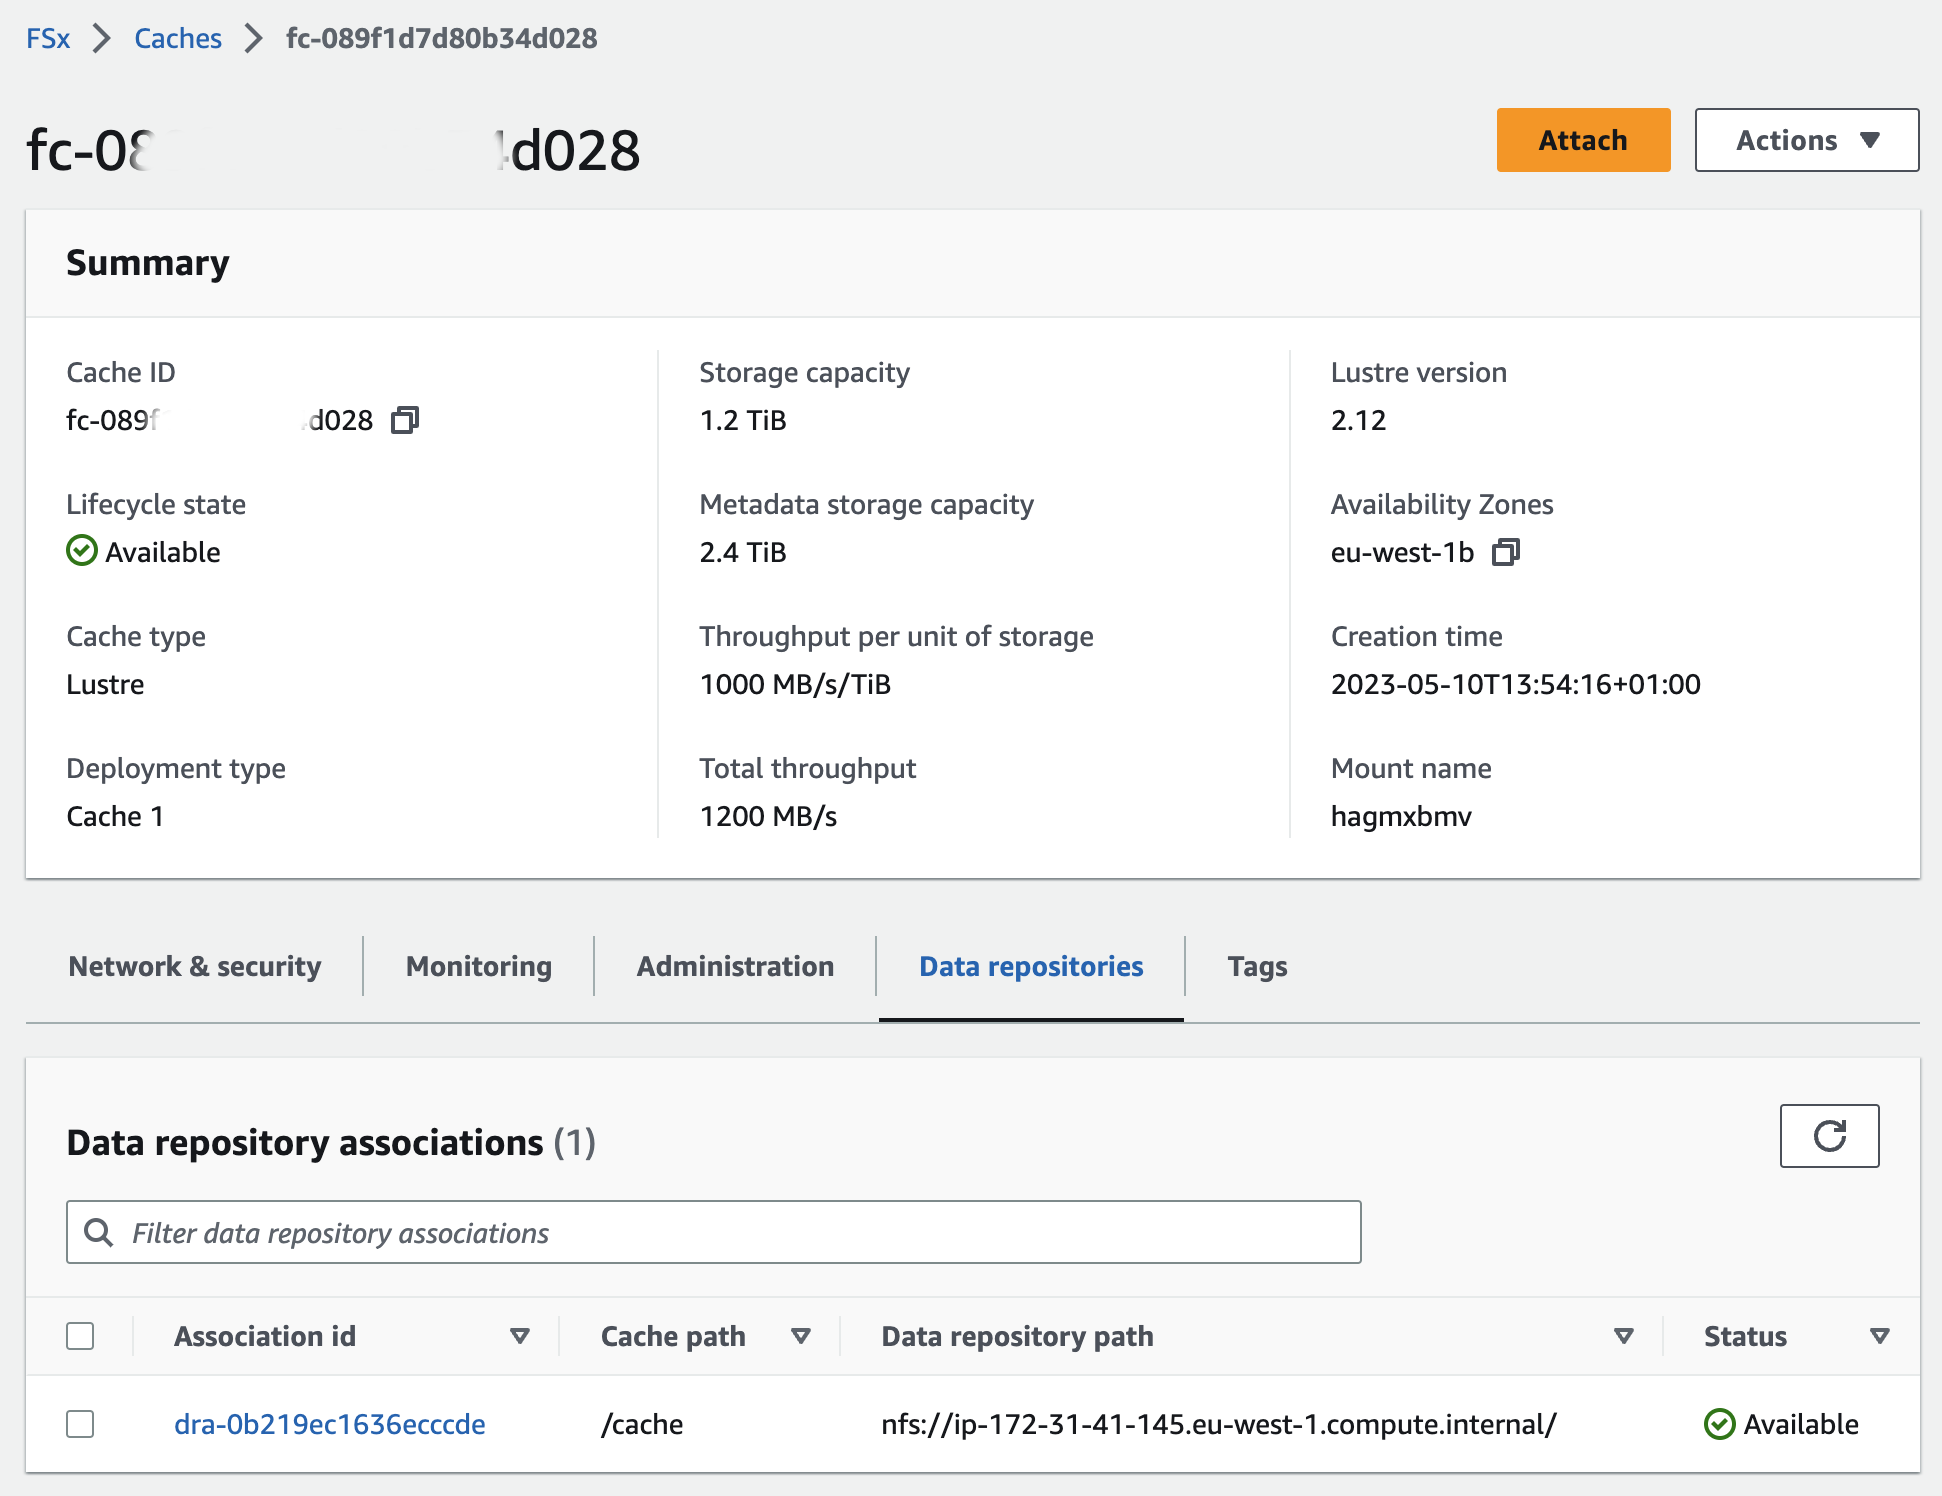
If you proceed before the status says available, the data will not be synced and the following steps will not work properly.