m. (Optional) Using ParallelCluster UI
This is an optional step, if you have time remaining in the lab time. Here you can perform a dry run edit of your cluster to understand how ParallelCluster UI matches the commands entered previously to create the cluster.

In this section we’re going to return to the ParallelCluster UI to perform a dry-run creation mirroring the setup created with the command line interface.
Note that the ParallelCluster UI can also be used to Edit a cluster.
The instances used have the following specifications:
| Instance Size | Cores | Memory (GiB) | Network Bandwidth (Gbps)* |
|---|---|---|---|
| c5n.xlarge | 2 | 10.5 | 25 |
| c5n.18xlarge | 36 | 192 | 100 |
- Click Create Cluster Button and choose Step by Step:

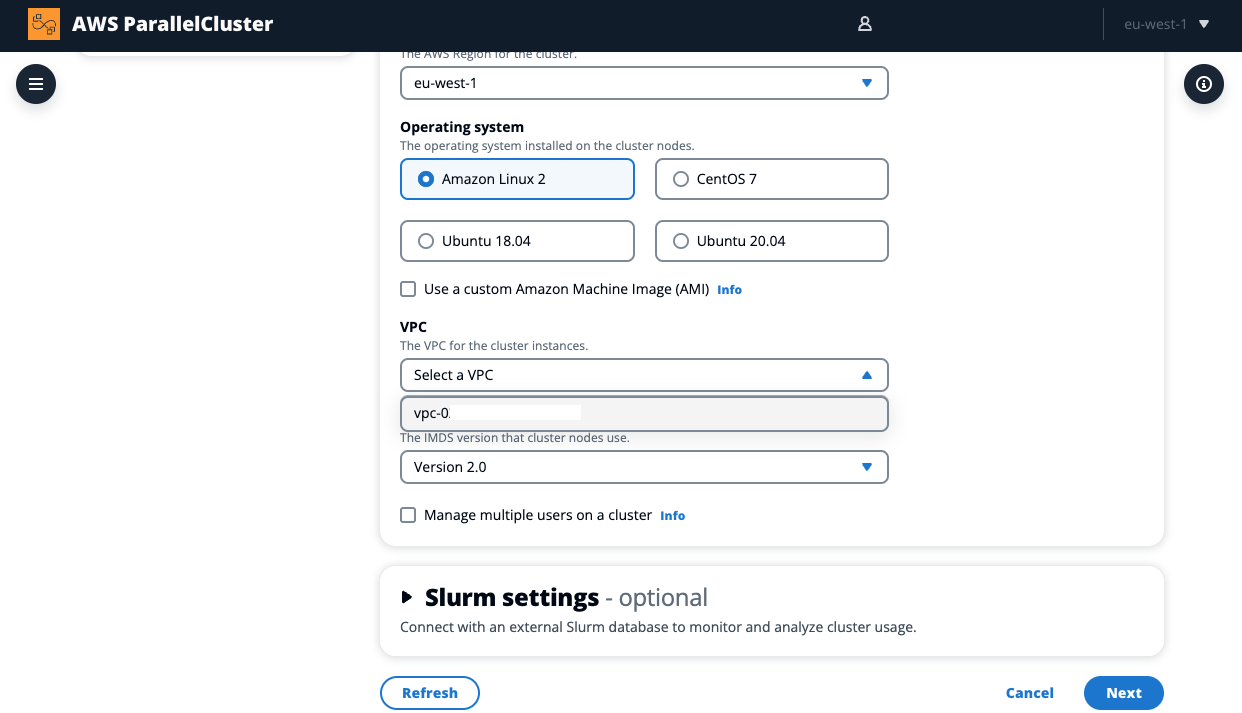
- Name the cluster hpc-cluster (remembering that the names of clusters need to be unique). The Region should still be set to eu-west-1, and Operating System should be the default Amazon Linux 2:

- Select a VPC from your account (there should only be the one default VPC), then push Next:
- Select the head node instance type to be c5n.xlarge and activate Add DCV, leaving the rest of the settings in the Head node instance section at their default. In the Networking section, select a Subnet or leave the default choice. Make a note of which subnet is chosen (either euw1-az1, euw1-az2 or euw1-az3). Select the lab-your-key for the Key pair in the Security configuration and permissions section. Then push Next:

- On the Queues page, the compute resources will be defined. Name the queue compute as was done earlier, then choose the same subnet (again looking for euw1-az*) that the head node used in the previous step. Remove any instance types listed for the compute resource, and choose **c5n.18xlarge**. Specify that a maximum of **2 Dynamic nodes** can be used, and select the options to **Turn off multithreading** and **Use EFA**. Then push Next:

- Choose Amazon Elastic Block Store (EBS) for the file system type and click Add storage:

This gives more options for that storage type. Using the settings given when the cluster was created earlier in the CLI, specify the gp2 volume type, a 50GB Volume size and the Delete Deletion policy. Push Next:

- The configuration YAML file should now be visible. This can be compared with the file generated in the Cloud9 instance earlier. Click Dry Run to confirm the setup. After a short time, a green box should show Success. If you wanted to proceed to create this cluster (e.g. if the cluster failed to create earlier), you could click Create. In this case click Cancel as the cluster has already been created.
